
Imagine your Michigan home as a blank canvas. Tired walls and chipped trim are like splotches of paint, detracting from the overall beauty. A fresh coat of paint, however, can be like a skilled artist’s touch, transforming your space into a masterpiece.
But achieving a flawless finish requires more than just picking a color and wielding a brush. Whether you’re a seasoned DIYer or entrusting the project to professionals, understanding the essential steps is paramount. This comprehensive guide, specifically tailored for Michigan homeowners, equips you with the knowledge and tools to paint your home like a pro.
Planning is Paramount: The Foundation for a Flawless Finish
A successful painting project, much like a well-built house, starts with a solid foundation – thorough planning. Here are crucial steps to consider:
- Identify Your Goals: Are you aiming for a complete interior makeover or a refresh of a single room? Identifying your goals early helps determine the scope of the project and paint quantity.
- Choose the Right Paint: Don’t underestimate the importance of paint selection! Consider factors like sheen (matte, satin, gloss), durability, and whether it’s for interior or exterior use. For Michigan’s specific climate, consider paints formulated for harsh winters and potential humidity. External Link: The Environmental Protection Agency (EPA) offers a helpful guide on choosing the right paint: https://www.epa.gov/sites/default/files/2015-09/documents/inpaint5.pdf.
- Gather Your Supplies: Don’t be caught mid-project missing a crucial tool! Create a checklist of supplies you’ll need, like drop cloths, painter’s tape, brushes, rollers, sandpaper, and safety gear (goggles, mask).
- Prepare the Surface: A smooth, clean surface is essential for optimal paint adhesion and a flawless finish. This often involves tasks like removing old paint, patching any cracks or holes, and sanding down uneven surfaces.
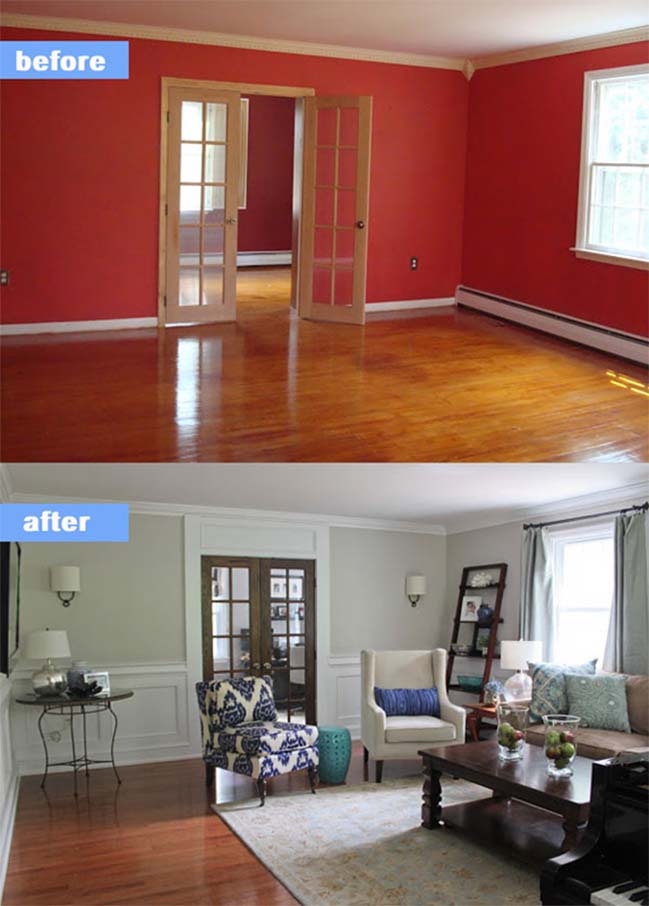
Project Spotlight: Revitalizing a Dated Living Room
Imagine a once vibrant living room, its walls now dull and the trim chipped from years of wear and tear. Our team at Cimple Home recently tackled this project, transforming the space with meticulous planning and expert execution. After consulting with the homeowner to understand their vision, we meticulously cleaned the walls, repaired minor cracks, and applied a fresh coat of warm beige paint with a satin finish. The result? A revitalized living room that exuded a sense of warmth and elegance.
Mastering the Art of Application: Techniques for a Flawless Finish
Applying paint may seem straightforward, but mastering the technique ensures a professional-looking finish. Here are key tips to remember:
- Proper Brushwork: Use a brush of appropriate size for trim and detailed areas. Employ a light touch and maintain a consistent stroke for even coverage.
- Rolling Techniques: Invest in a high-quality roller with a nap suitable for your chosen paint type. Apply the paint in long, even strokes with moderate pressure to avoid drips.
- Cutting In: Use a brush to “cut in” edges where the roller cannot reach, creating clean lines between walls, trim, and ceilings.
- Maintaining Wet Edges: Work in sections to avoid visible drying lines. Apply paint along a wet edge to ensure a smooth, seamless finish.
Pro Tip: Always test your paint color in a small, inconspicuous area before committing to the entire project. This allows you to assess the color in natural and artificial lighting to ensure it aligns with your vision.
The Finishing Touches: Ensuring a Long-Lasting Flawless Finish
The final touches are like the artist’s signature, adding a sense of completion and ensuring a long-lasting flawless finish. Here’s what to consider:
- Cleaning Up: Don’t let paint splatters detract from your masterpiece! Thoroughly clean brushes, rollers, and any spills with appropriate solvents. Dispose of paint-related waste responsibly.
- Touch-Ups: Inspect the painted surface for any minor imperfections. Use a small brush to address any missed spots or touch up minor blemishes.
- Proper Ventilation: Ensure adequate ventilation during and after painting. Open windows and doors to allow fumes to escape and promote drying.
- Furniture Placement: Wait for the paint to dry completely before returning furniture to the room. Refer to the paint’s drying time recommendations for guidance.
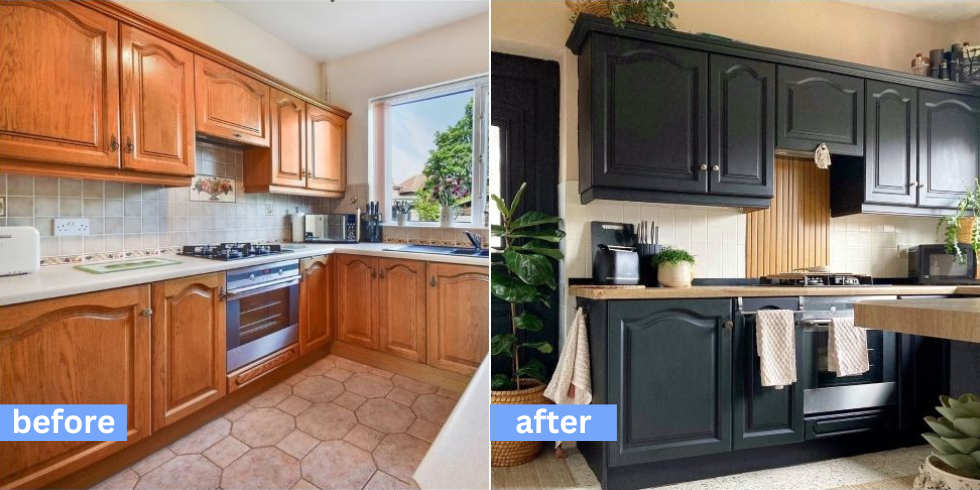
Project Spotlight: Bringing a Modern Touch to a Kitchen
A dated kitchen can feel like a culinary roadblock, hindering creativity and inspiration. Our team at Cimple Home recently transformed a kitchen by implementing strategic painting techniques. We used a crisp almond paint color on the walls to create a sense of brightness and spaciousness. For the kitchen cabinets, we opted for a bold, navy blue paint to add a modern touch and create a focal point. The contrast between the almond walls and navy cabinets was like adding a splash of color to a neutral canvas, instantly transforming the room’s ambiance.
Ready to elevate your Michigan home with a fresh coat of paint? Cimple Home offers professional painting services tailored to your specific needs. Our experienced team can provide expert advice on color selection, surface preparation, and application techniques. Contact us today for a free quote and let us transform your space into a masterpiece.